Monday, October 12, 2015

SCAN THE MONOLITH! A FAN-MADE SCENARIO FOR INVADERS FROM DIMENSION X! (by Marshall Dragoo)


Set up. Photo by Marshall Dragoo.


The Kay’Otz need to recharge the monolith and contact their home dimension for further instructions. So, they have sent a detachment to the wormhole to accomplish this task and guard the monolith while it draws its energy from the wormhole.

The USA marines have a scientific team attached to their special ops unit with scanning gear modified to work with their ‘BUMP’ guns. The scouts have a similar scanning device, but it has a much shorter range. The scans are needed by USA Marine Supreme HQ for study and analysis. 
_______________________________

Mapsheet Beta will be used for this scenario.

Starting forces: Kay’otz set up first. Place the monolith in hex 335, an overlord unit at 341, and a ‘bodyguard’ unit in 433, with a CF of 5. Then place 6 other warrior units, chosen at random to be set up in the following hexes: 456, 236, 263, 552, 553, and 615. Use a marker of some kind to designate the Kay’otz bodyguard unit.


USA marines will enter on one of the 2 road hexes on the western edge, 541 or 254. Their starting forces consist of 1 HQ, 1 special ops, 1 scout, and 5 marine squads.


Special rules: To scan the monolith, a special ops unit must use it’s BUMP gun at a range of 6 hexes. On a d6 roll of 5+, a successful scan will occur. The scout must get within 2 hexes and has the same roll of success as the special ops unit, a 5+. The special ops unit may use its BUMP gun as a weapon, but must wait a full turn to ‘switch over’ before doing so. 

Victory conditions: Instant victory for the player occurs under the following: 3 successful scans, plus elimination of the initial overlord and bodyguard units, plus 6 other units of the Kay’otz.

If this is not met, then the game will continue until the end as normal. If the Kay’otz do not win by their normal mission chit pull, then the player can win in the following conditions: 

2 scans, overlord/bodyguard unit and 6 other units eliminated, decisive victory. 1 scan, overlord/bodyguard unit eliminated, and 4 other units eliminated, major victory. Average victory for 4 units eliminated. Otherwise, the player suffers defeat. 

This scenario for Invaders from Dimension X! was created by Marshall Dragoo.


Thursday, October 8, 2015

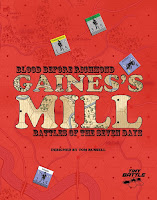
GAINES'S MILL, A JOURNEY (Guest post by Tom Russell)


Battle of Gaines Mill, Valley of the Chickahominy, Virginia, June 27, 1862

My first published game was 2012's Blood on the Alma, a brigade-level treatment of the first battle of the Crimean War. I'm not sure if it made as big of a splash as I had hoped, but people who played it tended to like it.


Among those who liked it was Mark Holt Walker, who asked me if I could do an ACW game using the same basic "stacks-of-steps" system. I think Mark was looking more for something along the lines of Gettysburg or Antietam, one of the big battles everyone knows. But I had a grand total of one game to my name at that time, and I was a wee bit intimidated about taking on one of the big ones. I ended up gravitating toward the Seven Days Battles, a topic that was decidedly (and undeservedly) under-gamed. There are running themes through these battles that I thought were compelling. Lee had ambitious plans that always fell apart when his generals failed to show up where and when he wanted. This included Stonewall Jackson, who demonstrated a bizarre and uncharacteristic lethargy. The attacks that were made came late in the day and consisted of piecemeal frontal assaults that usually crumbled against the Union's heavy guns. For his part, Union general George B. McClellan acted true-to-form, conjuring up enemy divisions out of thin air and treating every victory like a defeat. It was fascinating stuff and, I thought, eminently gameable.

And so I began working on Blood Before Richmond. It started, as these things often do, with research. I made weekly visits to my local library, searched the internet for period maps, and poured over casualty returns. I basically spent the end of that year and the first half of the next living in seven days from June of 1862, which truth be told was somewhat suffocating. I was glad I was working from an existing system; if I had to have done it all from scratch, it would have taken six more months.


The crux of the system is the use of Step Counters. The Step Counters serve two purposes: first, they allow for the gradual deterioration of a Unit's combat effectiveness, with each loss chipping away at the Unit's manpower, morale, and energy. When a Unit has three, four, or five steps they stay around longer than the two-step Units you find in most games.

Secondly, it better communicates the power of the artillery of the period. In a two-step game, an artillery attack and an infantry attack might have the same result: one step-loss. Functionally, they're the same. But in this system, an artillery attack can often inflict two or three horrendous losses at a time, especially at close-range. You can't get that same sense of horror and loss with a two-step game.

My goal was to make the system both simpler and deeper than Alma, which sounds more confusing than it is. One of the areas where I went simpler was with regards to terrain and movement. I've found that one of the biggest barriers to bringing new gamers into the wargaming hobby isn't the theme, the CRTs, the cardboard counters, or the math. It's the

Terrain Effects Chart slowing down the Movement Phase. "I forget, does this type of hex cost two MPs or three?" I wanted to speed it up as best I could. In Blood Before Richmond, each hex costs one MP, and you just add one MP each for modifying terrain: stream, forest, and going uphill. 

Alma had two flavors of combat; Richmond technically has five: close combat, with its sub-type of charge combat, and fire combat, with its sub-types of reactive fire and sharpshooter's fire. With everything but sharpshooting, combat consists of using modifiers to calculate the attack and subtracting a defense roll from the total. Alma had a table that players used to determine what constituted their defense roll, with a variable, x, that represented its number of steps and might even be multiplied before adding the die roll. Fiddly! And to that I say fie! As I mentioned before with regards to Terrain Effects on Movement, I wanted to render a TEC redundant. So in Richmond, you always add your steps to either 1d6 (clear hexes) or 2d6 (woods and high ground). No muss, no fuss. Artillery always rolls 2d6 (well, almost always; we'll get to that below) to represent their massive firepower.

Early in development I wanted there to be a "risk" to an Infantry's ranged attack while still keeping long-range attacks largely about morale. I didn't want to use a step-loss result, because it wouldn't make any sense if Infantry were shooting at Cavalry. I settled on the "RF" (Reactive Fire) result, which "triggered" fire in the Reactive Phase with the +2 bonus. This adds some depth to the ranged combat, as Units in EZOC can't perform Reactive Fire. So now there's an incentive to get some supporting Units in there, besides the +1 and the possibility of following up with a Close Combat later in the turn. But because the Unit whose defense roll causes the RF result doesn't necessarily have to be the one that performs the Reactive Fire attack, the enemy also has to take other Units with range/LOS to his attacker into consideration.

Charge attacks were added fairly late in development. A successful Charge attack gets a +2 or +3 modifier, which is nothing to sneeze at, and the defending unit only rolls 1d6 (including artillery). But these also trigger Reactive Fire. The idea is that the units being charged are firing at the Charging Units while those Units are on the move. It gives it a slight flavor of realism without getting into full-on Opportunity Fire and other trappings of tactical scale games, which I frankly despise.

Charges are very risky, especially against Artillery. It was important that I create that risk, and equally important that the possible reward of a successful charge sometimes merited that risk. Otherwise, no sane player would utilize them. The +2 or +3 is nice, but the defender rolling a single die is what clinches the deal (especially against single-counter Units such as artillery).

So, that's the core of it, which will likely get transplanted more-or-less intact to any other ACW topics I might tackle after the five games in the Blood Before Richmond series runs its course. But to really tell the story of the Seven Days, I needed a unique approach to activation that represented Lee's command-control troubles in a way that was appealing and fun. Briefly: each division is assigned an activation number ranging from 12 to 3 on the Lee Coordination Track. The Confederate Player rolls 2d6, and any divisions with a number that meets or exceeds the die roll. So, a "12" always activates, and a "3" seldom activates.

Lee Coordination Track represents Lee's personal coordination of forces.

Why a die roll, instead of a chit-pull mechanism? A chit-pull would create sufficient randomness and unpredictability, but would accurately reflect neither the greater difficulty some forces (such as Jackson's Army of the Valley) had in getting to the battlefield nor the way in which some forces (such as A.P. Hill's Light Division) did a disproportionate amount of the fighting and took a disproportionate number of casualties. The die roll mechanism, using simple 2d6 probabilities, accounts for these factors.

When the Confederate Player rolls well, he can bring up to six Divisions to bear upon the Army of the Potomac, and it looks like Lee's plan is going to work-- at least until the next turn. The Union Player is limited to two Divisions a turn. Of course, when he rolls badly, the Confederate Player will only have one Division, and since that Division is going to be activated each turn, it's likely to have taken more losses.

The vagaries of the die roll can be frustrating for some players (as the situation was no doubt frustrating to Lee). The Confederate Player can't count on certain Divisions, but he can certainly try to create flexible opportunities for them should they appear. 

Gaines's Mill map with art by Ilya Kudriashov

Blood Before Richmond was intended to be a boxed game comprising five battles, each with its own 14x14 inch map. There are a number of reasons why it didn't work out that way which I won't really get into here. The long and short of it is that it's been converted into a series of cheaper single-battle folio games. The move to an 11x17 inch map necessitated the removal of two rows of hexes from each map, but in each case I was able to demarcate some edge-rows for removal without damaging the spatial relationships between the forces. The first two games, Gaines's Mill and Glendale & White Oak Swamp are the most straightforward and the best for competitive play.

Julian Vannerson's photograph of Robert E. Lee in March 1864

Gaines's Mill has some of my favorite special rules in it. The Lee Bonus represents Lee's personal coordination of forces for the final (and successful) assault. I wanted to get across the sense of a renewed effort, of a big final push, and the second Confederate Close Combat Phase in Turn 6 seemed to do the trick. For a while, I gave the Union their final turn, but with the reinforcements coming in on the late turns it became too easy for them to reverse Confederate gains. Historically these late arrivals did little more than act as a rearguard for the Union's retreat. For these historical and game balance reasons, it made more sense to end Turn 6 with the Confederate Turn.

Depending on which Divisions activate and when, the Confederate Player might find it profitable to try and get behind the Union-- and the Union will find it profitable to prevent them from doing so! One mistake I see novice Confederate Players make is to array Longstreet and Hill's Divisions in a long, thin line. It's better to attack with some Units, hold others in reserve, and switch them out when the time is ripe. Make sure to pull back weakened Units to avoid eliminations that will cost you Victory Points. Above all, make sure you have some strong Units with which to make the final assault in Turn 6; one- or two-step Units are unlikely to make any gains or inflict many step-losses. 

The Union Player should be prepared to give a little ground, and then push back. Don't let three or four Units close in on your Artillery. As with pretty much all of the scenarios, they and the terrain they occupy are your biggest advantages; don't squander them. Make good use of independent Units, particularly the Sharpshooters, to give yourself more flexibility with the activations and to limit enemy approaches.

November should see the release of Glendale & White Oak Swamp. This one has likely the most interesting (read: difficult) map. The dense woods slow down the approach considerably, and well-placed Union Artillery can bog down and bottleneck Confederates who opt to avoid the woods. For the most part, the Union Units are fresh while the lead Confederate Divisions are showing some wear and tear. 

If Gaines's Mill and Glendale show off what the system can be, the three that follow are more idiosyncratic, presenting challenging situations with unusual special rules-- Savage's Station is just a really weird battle; Beaver Dam Creek makes it harder than usual for the Confederates to activate; Malvern Hill is the very definition of lopsided as the rebels make a desperate and doomed assault on strong Union positions.  

I hope you'll find all of them interesting enough, and all of Ilya Kudriashov's maps gorgeous enough, to get all five, and that they will be enough interest to sustain other games using the same core system. I hear that there's three days in July of 1863 that might be fun to spend the better part of a year in...

http://tinybattlepublishing.com/products/gainess-mill

March over to Tiny Battle Publishing.


Friday, October 2, 2015

DORKING 1875: THE GERMAN CONQUEST OF BRITAIN

 
Dorking 1875 map by Ilya Kudriashov


Dorking 1875: The German Conquest of Britain, designed by Mark Wightman, is based on the genre-defining classic of military alt-hist fiction, The Battle of Dorking, by G.T. Chesney. In this 1871 novella (originally appearing as a serial in Blackwoods Magazine), Chesney asked what would happen if Britain was to be invaded in the near future. His answer: the ill-prepared and outdated military would be crushed by a newly reunified Germany. Not so far-fetched considering it came on the heels of the humiliating and alarming defeat of the Second French Empire in a whirlwind campaign a year before. The story sent shockwaves throughout the general public, and jump-started important reforms in the British military. 

Wightman’s Dorking 1875 recreates one version of the most famous battle that never was.

Dorking 1875 cover by Tom Russell

Counters by Ilya Kudriashov

Dorking 1875: The German Conquest of Britain coming in October from Tiny Battle Publishing.


Monday, September 28, 2015

WINTER THUNDER: A NEW OLD GAME (Guest post by Brian Train)


Winter Thunder is an operational-level game of the Battle of the Bulge, the famous German offensive of December 1944 in the region of the Ardennes Forest. It is a substantial revision of Autumn Mist, an earlier design of mine on the Bulge. Among the many changes are: a newly researched order of battle, with revised counter values and reinforcement schedule, cleaned up rules including a solitaire play system, and a drastically revised map with a different ground scale and treatment of terrain. 

Winter Thumder map

We changed the title to reflect these changes and to relate it to Summer Lightning, a game on the 1939 invasion of Poland that Mark Walker cajoled me into designing and publishing w/’ Load in 2011. The two games share most systems, including similar time and unit scales, and in my view nicely bookend the beginning and end of the era of German “blitzkrieg” offensives.

Why do a game on the Bulge? There are already dozens and dozens of games on this battle, at all scales from squad level to corps. It all goes back to an opportunity that presented itself in the waning days of the Microgame Design Group, the first company to publish my designs. The company was approached in 2002-03 by a Spanish magazine that wanted to experiment with putting wargames into its issues, but they only wanted games on the “Big 5 Battles” – Waterloo, Gettysburg, Stalingrad, Normandy, and the Bulge. A couple of designers in the “stable” took a swing at designing games with a newer take on the subject battles, but after the deal with the magazine fell through and the Design Group went on hiatus, only mine was picked up by an outside company, Fiery Dragon Productions, in 2004.

This was one of the few times when I have designed a game on something I wasn’t particularly interested in, but I had been working out a game system to handle corps/army operations, and here was an opportunity to get a quick publication. At the time I joked that there was an unwritten rule that every game designer had do to a Bulge game at some point in their career if they wanted to be taken seriously, and this one was mine. My original testbed for the system was to be a game on the 1945 Soviet offensive in Manchuria; after designing four games using this system (Autumn Mist, Summer Lightning, Balkan Gamble, Winter Thunder) I still haven’t gotten around to doing it!

The game’s sequence of play is made interactive by the HQ activation system. Each game turn chits for headquarters (HQ) units are picked randomly from a pool containing all chits from all sides. The corresponding HQ unit on the map can then put a certain number of units near it “under command”, enabling them to move and conduct combat. In 2003 this method was not very new but hadn’t been used in any Bulge game.


The combat system is what I call “near diceless”. The attacking and defending players secretly choose missions based on what they want to do, and what they think the enemy will do. The two are matched on the Mission Matrix Table, which will indicate any advances or retreats and whether one or both sides has to check for casualties, and if so with what modifiers. I am indebted to Jim Stahler for the essence of the Mission Matrix idea, which I have heavily modified, from his variant article for Blitzkrieg in the magazine The General volume 18, number 6 (March-April 1982).

Mission Matrix Table
The two armies represented in the game are differentiated within this system. The Germans have a larger number of HQ units in the pool to activate, and initial numerical superiority. But the Allies (in practice, the Americans: the British 30 Corps is represented fully in the game but enters the fray only if the German threatens the Meuse River crossings) have more divisions overall with more motorized units, faster strategic (road-bound) movement and generous groupings of heavy artillery and airpower. So it’s a question of the German making hay while the snow flies, then switching to a mobile defense when the Allied counterattack gets underway.

There is a campaign game scenario that runs from December 16 to January 3, a bit longer than many Bulge games. There is also a short “Home for Christmas” scenario which assumes the Germans launch an offensive with more localized aims and fewer resources. Also, because so many war games are designed for two but played by one, we included an optional solitaire play method.

I hope you enjoy this game. I appreciated the chance of a do-over, 12 years after its first publication.

Coming in October to Tiny Battle Publishing.

Friday, September 25, 2015

WINTER (THUNDER) IS COMING


Winter Thunder is coming to Tiny Battle Publishing. It is an operational-level game of the Battle of the Bulge by designer Brian Train and it's a substantial revision of its former incarnation, Autumn Mist, which some of you may remember was published by Fiery Dragon Productions back in 2003. 

I thought you might like to have a peek at the exceptional art that John Cooper, artist extraordinaire, has done for the game.

First up is a section of the map.


American and German unit counters.


British, American, and Luftwaffe.


Some of the markers.


Keep an eye out for more on Winter Thunder.

Thursday, September 24, 2015

DESIGNING "WE HAPPY FEW" (Guest post by Tom Russell)


When Mark and Mary asked me if I wanted to design a game for Tiny Battle, I leapt at the chance; I’m fond of both of them, Mary especially. For me, Agincourt was a natural choice, for a number of reasons:
  1. I already have a medieval period gaming system, Shields & Swords. Using an existing system greatly speeds up the process of designing and testing the game as I’ve already done most of the work and solved most of the problems. Now, because S&S is really built for the early medieval period, and 1415 is a substantially different animal, the system had to be heavily-modified, but even that’s still faster than doing it all from scratch. Now, medieval games don’t sell as well as other periods (ACW, WW2, Napoleonics), but...
  2. This October marks the 600th anniversary of the battle. Anniversaries can often translate into sales. You’ll often see wargamers in various forums asking, “How are you commemorating the famous battle of X?”, by which they mean, “What game on X are you going to be playing?” “Oh, there’s a new game on X? Maybe I’ll pick that up.” Cross-reference the uptick in ACW games sold between 2011 and 2014, and the renewed interest in the Great War. If ever there was a time to release a game about Agincourt, this is it.
  3. It’s a well-known battle, probably the best known from the period. I have other
    Medieval cow
    Shields & Swords games that might be appropriate for Tiny Battle, but all of them are comparatively more obscure. I say “comparatively” because while someone with an interest in medieval history has probably heard of the Battle of the Bouvines and wouldn’t consider it obscure, the general populace will think it’s got something to do with cows. Whereas most people have heard of Agincourt, and know the basics: “vastly outnumbered English bowmen beat the French”.
  4. Vastly outnumbered English bowmen beat the French! I love battles where there is a striking disparity in the type and strength of opposing forces. You basically have a handful of English archers up against a French host that’s four times* its size and comprised mostly of the best-armed, best-trained knights around. And the English win! (*Estimates vary wildly for Agincourt; 4:1 is the ratio I used as it both seemed the most plausible and best fit the parameters of the game.)
  5. It also let me do a test-run for a system I designed for a WWI game that is still deep in development. This system replicates “moving in the open against enemy fire” without resorting to Opportunity Fire. Modern tactical isn’t really my scale, and the reason why is that I get tired of moving one hex, asking if my opponent wants to shoot me, moving another hex, asking if my opponent wants to shoot me, and so on (partially this is because she always does). This mechanism avoids that by resolving enemy fire “automatically” with hits sustained for each hex entered within the enemy’s Approach Zone. It works really well for Agincourt, and “folds in” the muddy terrain conditions that hampered the French advance and made them such juicy targets.
Development and testing moved at a fairly brisk pace. Going in to it, I figured that the victory conditions would be the one thing that would change the most between the first test and the last, and I was not disappointed. Agincourt is a challenging battle not because the historical result was so lopsided, but because it was so lopsided in favor of the side that was outnumbered and desperate. The Approach Zone mechanism, and to a lesser degree command structure, went a long way toward replicating the historically decisive factors, but deciding at what point the game ended was difficult. If the English VP threshold was too low, the game would end too soon and the French would never have a chance. If the threshold was too high, it gave the French too much time, and made it too easy for them to win. (Likewise, the French VP threshold itself needed to be low enough to be attainable but high enough to be difficult.) It took some doing, and required some disparate conditions: the French win if they have 10VP, while the English win if they have at least 30VP more than the French Player. The English generally rack up some very nice VP early on, but the longer the game continues, the easier it becomes for the French to score VP.

Before the testing had concluded, we already had our artists in place. Alex Krumwiede, who I worked with before on my upcoming fantasy game Shadows in the Weald (Yaah! # 5), was asked to do the art for the counters. He’s not a wargamer himself, and so the actual layout of the counters, as well as the map, fell to the talented Jose R. Faura, who I also worked with on my game with White Dog, Von Moltke’s Triumph. Map art for the medieval period is especially challenging, because most battles were fought over very simple, often flat, terrain. It’s hard to make grass interesting, but Jose managed it in spades.

I had designed a cover for We Happy Few as I did for my other game in Tiny Battle’s initial line-up, Gaines’s Mill. But while the latter passed muster, Mark thought my We Happy cover was a little blah. So we asked Jose to come up with something a little more lively, and he turned in a nice cover crazy-fast. 

Original cover
Final cover

"We Happy Few" recreates one of the most famous battles of the Middle Ages by using the basic skeleton of the S&S system seen in such titles as Flying Pig Games’ "Stamford Bridge" and "A Hill Near Hastings", with important modifications to better suit both the later era and this specific battle. Chief among these is a clever, speedy, and diceless alternative to opportunity/reaction fire concepts that reflects the difficulties inherent in moving under missile fire. Shoot over to see it.


My goal was to make an Agincourt game that was both historically accurate given the chosen level of granularity and fun to play for both sides. Almost all games on Agincourt I’ve seen have either been one or the other but never both. One such game's designer basically threw up his hands and admitted in the rules that the French Player wasn’t going to be able to make any meaningful decisions anyway, and that you should just play the game solitaire. Nuts to that, man! While We Happy Few is perfectly suitable for solitaire play, it’s designed for two players, and keeps both of them engaged. It’s possible for a good French Player to pull off the win (or even a middling player; I’ve done it a couple of times now). It’s difficult, sure; it is, after all, the Battle of Agincourt, and not the Battle of Equally-Matched Armies Fighting to a Draw. Experienced gamers wanting to play with a new gamer will likely want to take the more challenging French side themselves. “Challenging”, not “hopeless and hampered by fiddly little idiot rules”.

Somewhat immodestly, the back cover copy declares that We Happy Few is “the only Agincourt game you’ll ever need”. I’m probably the least qualified person to make that determination, but it’s certainly more to my taste than other takes on the battle, and I hope it will be more to yours as well. 

Monday, September 21, 2015

CHRISTIAN SPERLING ON NEUSCHWABENLAND (Guest post by Christian Sperling)


Map of Antarctica with Neuschwabenland

I was looking for a new wargame to play, and I had a very precise idea of what I was looking for. I wanted streamlined, simple rules-- nothing too complex-- low counter density and a small map, solitaire friendly, easy quick combat resolution, and, finally, an awesome and unusual theme. Just a small game to have fun with, maybe in the vein of the old Micro-games from Metagaming Concepts, like OGRE or Chitin.

My search wasn't prosperous. When the theme was attractive and cool, the rules were too complex. When the rules were streamlined, the theme was uncool. Or the game wasn't in print. And so on.

Then I thought, why not design the game myself? And so here we are.

From the start, my theme was clear. I'm a fan of old sci-fi classics like The Thing from Another World and War of the Worlds, and I love weird conspiracy theories, like "the Nazis built a secret base in Antarctica". I combined the two interests, and thus the idea of the third Reich fighting Aliens in Antarctica was born.

Lobby card for The Thing From Another World

The next step was to research the arctic environment and arctic warfare. The book Mythos Neuschwabenland (Myth New Swabia) was very evocative in its descriptions of this fascinating landscape. I watched old training films and read books about Mountain Troops to learn more about warfare under severe climatic conditions.

I tried a few different dice-based combat systems for the game, but found the perfect one quickly. I drew inspiration from the heavy and light combat dice system in Space Crusade, a game from my childhood.

The real challenge was giving each of the two factions a different play style. I decided that the hive-minded Aliens should be built for close combat, while the Reich should rely more on ranged combat and special equipment. I solved my problem by using different activation systems: the Aliens activate all units, but have variable movement points, while the Reich can activate only some of their units, with fixed movement points. A side effect of these differences is that it made the game very suitable for solitaire play, which was one of my goals.

I know it's unusual for a designer to do his own art. I had done graphics for other games previously-- nothing professional-- but the past experience was helpful, and doing the art wasn't any kind of hindrance. I went with a light-hearted comic book look; I think I was playing a lot of Borderlands at that time. :-)

Sample counters for Sperling's Neuschwabenland

I had a lot of "interpretational freedom" in designing the game, as there is no "real world data" to consider for fictional units like the Tripods, Worms, and Haunebu. I drew inspiration from movies and books, but generally let my imagination run free. I had to be careful not to go overboard so as to keep everything balanced. Fun trumped realism every time.

After playtesting and writing the rulebook, the game was good to go. I had proofread professionally published rulebooks before, but writing a book was a different matter altogether. This was especially true with the English version of the rules, since English isn't my first language. Tiny Battle's Mary Russell, and her husband Tom, helped refine the English version of the rules, so this wasn't a problem. I have to thank them for their help and support. I also need to thank Mark H. Walker for the same. Without their professionalism and experience, a professionally published, physical copy of my game would not have been possible.

Hope you enjoy it!

Check out Christian's game at Tiny Battle Publishing. 


Neuschwabenland comes with six unique scenarios played on a single map, along with a Campaign Game that links the scenarios. Play time for each scenario varies from 30 minutes to an hour. The game's beautiful map, crisp rules layout, and gorgeous counters were all created by designer Christian Sperling, resulting in a uniquely cohesive experience. Ski over here.